Using Custom Images and the Personal Image Library
pbSmart™ Codes allows you to import your own images for use on a mobile web page, allowing you to add personality to your campaigns and customize the look-and-feel to match your company brand.
This article shows you how to import custom images into your QR code campaigns and manage them in your pbSmart Codes Personal Image Library. Note: the use of images applies only to QR Codes linked to a mobile web page campaign. (The other type of QR code you can create in pbSmart Codes is called a “Basic QR Code”. These QR Codes link directly to an email address, phone number, Vcard, existing website, Facebook or Twitter – and do not allow for the use of personal images.)
When you create a new QR Code Campaign or edit an existing campaign, you will come to the step, “Customize Mobile Site”, which allows you to set up your campaign’s mobile web page. Within your mobile web page there are two different areas where you can use your own images: the Headline area and the Campaign Message area.
Adding Images to the Headline Area:
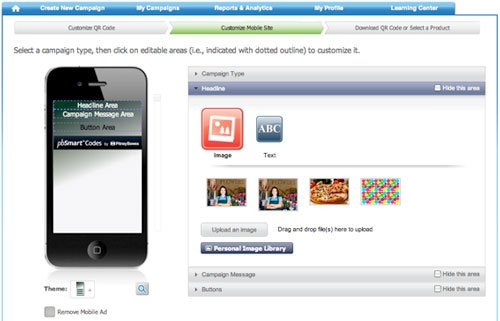
To begin editing the Headline area, click within the headline on the preview on the left-hand side, or click the Headline bar in the editor on the right hand-side. You have the option of using either an image or some text for your headline. To use an image, click the red Image button. Below that button, you will now see a partial list of images that you have already uploaded to your Personal Image Library:
Within the Headline editor, there are four ways to select an image for your Headline area.
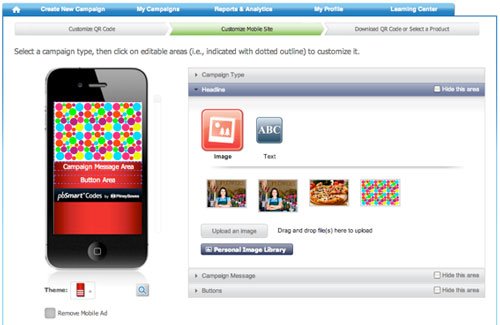
When you have selected an image using any of these methods it will be displayed in the mobile web page preview on the left-hand side of the editor as shown below. Note: Ensure that your image is at least 320 pixels wide if you would like it to span the full width of your mobile web page.
1. Click on any of the existing Headline images shown.
2. Click Upload an Image to select and use an image stored on your computer.
3. From any folder on your computer you can drag an image file to the text: Drag and drop file(s) here to upload. As the dragged file hovers over the text, a blue box will appear under the text to let you know you can release and upload the file.
4. Click Personal Image Library to choose from a larger selection of images stored there.

To remove an image from the Headline area, click the Text button and click your mouse within the text-entry box. The headline image will be removed and a default text message will now appear in the Headline area instead.
Adding Images to the Campaign Message Area:
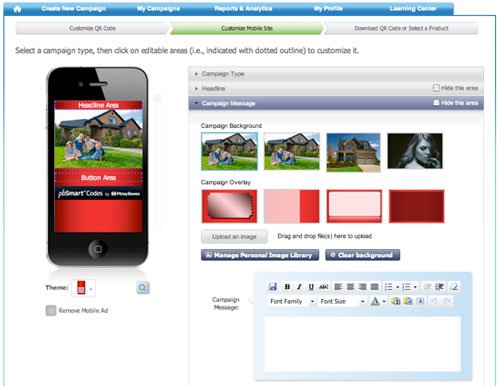
Within the Campaign Message area, you have the option of adding your own Campaign Background image to personalize your mobile web page even further.As with the Headline area, you have four ways to select a Campaign Background image:
When you have selected an image using any of these methods it will be displayed in the preview on the left-hand side of the editor as shown below. Note: Ensure that your image is at least 320 pixels wide if you would like it to span the full width of your mobile web page.
1. Click on any of the existing background images shown beneath the text “Campaign Background”.
2. Click Upload an Image to select and use an image stored on your computer.
3. From any folder on your computer you can drag an image file over to the text: Drag and drop file(s) here to upload. As the dragged file hovers over the text, a blue box will appear under the text to let you know you can release and upload the file.
4. Click Manage Personal Image Library to choose from a larger selection of images stored there.

To remove a Campaign Background image from the Campaign Message area, simply click the Clear Background button.
Note: In the Campaign Message editor, there is also an option to add a Campaign Overlay. These overlay images are default images provided by the pbSmart Codes system – it is currently not possible to add to these or edit them.
Managing Images in Your Personal Image Library
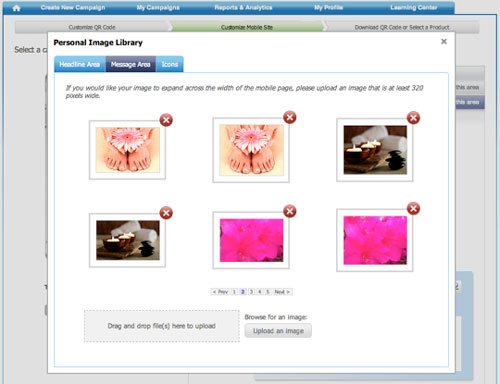
From both the Headline editor and the Campaign Message editor, there are buttons to access your Personal Image Library. This library is a collection of all the images you have uploaded to pbSmart Codes, displayed in different categories based on their intended use.The screen capture of the Personal Image Library shows the three categories sorted into tab headings along the top: Headline Area, Message Area, and Icons.

Images uploaded to the Personal Image Library, are available to use in the Campaign Message or Headline of your mobile web page. The “Icons” category is a general category for logos, etc., which can also be used in the Headline or Campaign Message area. To upload images to your Personal Image Library, either click the Upload an Image button, or drag-and-drop a file from a folder on your computer to the box labeled: Drag and drop files(s) here to upload. If you have uploaded more than six images, you can browse through them by clicking any of the page numbers or the Prev and Next buttons. To delete an image from the Personal Image Library, simply click the red “X” button in the top right-hand corner of an image preview.